We use cookies to offer you a more personalized and smoother experience. By visiting this website, you agree to our use of cookies. If you prefer not to accept cookies or require more information, please visit our Privacy Policy.
Question: How do I configure Realtek 5.1ch audio output on N100M under Windows 10?(10/29/2024) Answer: Please follow the steps below.
1. Go to BIOS\Chipset Configuration and set Intel SST to "Enabled”.
2. Boot into Windows. Download and install Realtek high definition audio driver version:6.0.9503.1_RTK_SST and follow the instructions, restarting the system after the installation.
Realtek high definition audio driver ver:6.0.9503.1_RTK_SST:
Procedures
●Intel Graphics Card Driver
Go to Intel's official website to download and install the latest official graphics card driver.
● Update the Graphics Card FW
Step 1. Download and unzip IGFXUpdate(v1.01.1).
Step 2. Run "IGFXUpdate”
Step 3. Click Yes to restart the system.
Step 4. After the system has restarted, the FW update will begin.
*If this message doesn't show up, please disable the "Secure Boot” in BIOS and try again.
Step 5. During the update, the following security message will pop up.
Step 6. Click on Install this driver software anyway.
Step 7. The update process will proceed. The screen might blink during the update.
Step 8. Please restart your computer when the following prompt is shown.
● Set PCIe Power to Maximum Power Savings
Step 1. Go to [Control Panel\Hardware and Sound\Power Options\Edit Plan Settings\Change] and click [Change advanced power settings].
Step 2. Scroll down to PCI Express\Link State Power Management and select Maximum power savings. Make sure to click apply to apply the changes.
● Re-install the Graphics Card Driver and Check the GPU Power
Step 1. Reinstall the latest graphics card driver.
Step 2. To check the power consumption of the Intel ARC graphics card, please open Intel Arc Control and find the GPU Core Power.
BIOS Setting For ARC GPU Power Saving
● ASRock Intel Motherboard:
Required BIOS Version:
700-series motherboard: Please use the latest BIOS
600/500/400-series motherboard: Use the latest BIOS. It that does not work, please contact ASRock Technical Support. https://event.asrock.com/tsd.asp
BIOS Settings for all ASRock Intel models:
In BIOS > Advanced > Chipset Configuration, apply the following settings.
PCI Express Native Control: Enabled
PCIE ASPM Support: L1
PCH PCIE ASPM Support: L1
● ASRock AMD Motherboard:
Required BIOS Version:
Platform
600 series
500 series
400 series
300 series
BIOS version
Any version
Not supported
BIOS Setting for all AMD models:
There is no need to change BIOS settings.
● Other brands motherboard:
Please contact your motherboard vendor for further assistance.
Power Consumption After Updating FW and Changing the BIOS Settings
Question: Which BIOS settings do I need to adjust when using 13.3” Side Panel?(3/1/2023) Answer: Before using your side panel, please set "Primary Graphics Adapter” to "Onboard” in the BIOS settings to ensure the display work properly.
Intel 700 series:
To do so, please go to "Advanced”> "Chipset Configuration” and set "Primary Graphics Adapter” to "Onboard”. Then press [F10] to save the settings and restart the system.
AMD AM5:
Please go to "Advanced”> "Onboard Device Configuration” and set "Display Priority” to "Internal Graphics”. Then press [F10] to save the settings and restart the system.
Question: Which CNVi WiFi modules are compatible with my motherboard?(4/1/2022) Answer: First please determine which type of WiFi/Bluetooth(BT) module you can use on your motherboard. Second, if you want to use CNVi, you will need to check which generation of CNVi your motherboard supports.
Which type of WiFi/BT module is supported on your motherboard?
In general, there are 2 types of WiFi/BT modules that can be used via a Key E M.2 socket.
One type uses a regular PCIe connection (for WiFi) and USB connection (for Bluetooth) via the M.2 socket.
The other type uses CNVi, which is available on specific Intel platforms only: https://www.intel.in/content/www/in/en/support/articles/000026155/wireless.html
On the Asrock website, please check the specifications of your motherboard to determine which type is supported on your motherboard. Here are some examples.
If you would like to use CNVi, please note that there are different generations of CNVi. The table below shows which chipset supports which CVNi generation.
Intel Chipset
Supported CNVi System Interface Type
Intel 300 series
M.2: CNVio
Intel 400 series
M.2: CNVio and CNVio2* *CNVio2 support only for Model Intel AX101, AX201, AX203.
Intel 500 series
Intel 600 series
M.2: CNVio and CNVio2
Intel 700 series
M.2: CNVio and CNVio2
Checking the specifications of WiFi/BT modules
To check the "System Interface Type” of your WiFi module, please visit Intel® ARK for further information.
Question: How do I enable C.A.M. (Clever Access Memory / Resizable BAR) on H510 Pro BTC+?(10/27/2021) Answer: Please follow the steps below to enable C.A.M. (Clever Access Memory) on H510 Pro BTC+.
Step 2.
The C.A.M. (Clever Access Memory) option is supported when integrated graphics are disabled.
By default integrated graphics will be disabled when a PCIe graphics card is detected.
Please make sure the monitor is connected to the graphic card.
Step 3.
Please go to BIOS\Advanced\Chipset Configuration and enable "C.A.M. (Clever Access Memory)”.
Step 4.
Press F10 to save the setting and restart.
Question: I want to turn off the LED while the system is off. Where can I find the setting?(7/1/2021) Answer: Please follow the steps below and set the "Turn on Onboard LED in S5” setting to disabled under the BIOS.
Step 1.
While the system is starting, press hotkey "F2” or "Del” repeatedly to enter BIOS setup.
Step 2.
Disable the "Turn On Onboard LED in S5” under the BIOS.
AMD platform: Advanced\Onboard Devices Configuration\Turn On Onboard LED in S5\Disabled
Intel platform: Advanced\Chipset Configuraiton\Turn on Onboard LED in S5\Disabled
Question: How to enable C.A.M in the BIOS? Also known as Resizable BAR.(4/1/2021) Answer: Step 1: On the ASRock website please find the BIOS download page for you motherboard.
Check the descriptions to see if C.A.M. is supported already.
Intel 500-series models support C.A.M. since the first version.
Step 2: While the system is starting press "DEL” to boot into BIOS setup and go to BIOS\Boot\CSM.
If you cannot find the CSM menu then please set "Fast Boot” to "Disabled”.
Step 3: In BIOS\Boot\CSM please set "CSM” to "Disabled”.
Step 4: Go to BIOS\Advanced\Chipset Configuration and set "Above 4G Decoding” to "Enabled”.
Step 5: After step 4, the option "C.A.M” will appear below the option "Above 4G Decoding”.
Please set it to "Enabled”.
Step 6: Press "F10” to save the settings and restart the system.
Question: How to enable WiFi with AC 8260 card on H370 Performance motherboard?(1/1/2019) Answer: In order to make AC 8260 Wifi work, please adjust the setting in BIOS below:
Set M2_3/PCIE_3 Switch to Force_M.2 under the path Advanced\Chipset Configuration
After adjusting the above setting, please press "F10” button to save the change.
Question: How do I get WiFi function work after my system resumes from sleep mode on X299 platform?(12/1/2017) Answer: Please follow the steps below to set up your system.
Step1. Please install the WiFi utility driver v19. 60.00 from the link below.
Link: https://download.asrock.com/Drivers/Intel/WLAN/Intel_WiFi(v19.60.00).zip
Step2. Please enter BIOS setup and set "WAN Radio” to [Enabled]. Then please press [F10] to save the setting.
(Path: BIOS > Advanced > Chipset Configuration > WAN Radio)
After applying the setting as above, the WiFi function can work properly.
Question: I'd like to use the Windows Mixed Reality Headset on on-board HDMI, what should I do?(12/1/2017) Answer: Please follow the steps below
1. Refer to the "Microsoft Windows Mixed Reality PC hardware guidelines” to check the system hardware requirement. https://support.microsoft.com/en-us/help/4039260/windows-10-mixed-reality-pc-hardware-guidelines
*The Windows Mixed Reality requires Integrated Intel HD Graphics 620 or greater DX12-capable integrated GPU.
2. If an external graphics card is installed, please enable "IGPU Multi-Monitor” under BIOS.
BIOS Path: Advanced > Chipset Configuration > IGPU Multi-Monitor
3. Download the VGA driver version 15.60.01.4877 from the Intel download center and Install it on your system.
Download Link: https://downloadcenter.intel.com/product/128199/Graphics-for-8th-Generation-Intel-Processors
4. Install the "Windows Mixed Reality Headset” USB 3.0 connector to the on-board USB3.0 port.
5. Install the "Windows Mixed Reality Headset” HDMI connector to the on-board HDMI port
The Windows Mixed Reality Headset should work now.
Question: If I'd like to install the mining VGA card without display output, what should I do? (7/1/2017) Answer: Please refer to the following path to adjust the "Primary Graphics Adapter” to [Onboard].
Path: BIOS → Advanced → Chipset configuration → Primary Graphics Adapter → Onboard
Question: How do I turn off USB port power under S5 mode? (7/1/2017) Answer: USB port power can be turned off by enabling "Deep Sleep” option.
Please press "F2” or "Del” during POST to enter BIOS setup, select the "Advanced” menu and enter the "Chipset Configuration” page, and adjust the "Deep Sleep” option to "Enabled in S5”.
After adjusting the setting, press "F10” to save the configuration. Then USB port power will be turned off under S5 mode.
Question: How do I play a 4K BD movie through a Pioneer Ultra HD Blu-ray drive on Z170 Gaming-ITX/ac?(4/1/2017) Answer: Requirements:
O/S: Windows 10
Receiver / decoder: Onkyo TX-NR 747 or other receiver supports HDCP 2.2
Playback Software: Power DVD 14 (from Pioneer Ultra HD Blu-ray Drive)
http://www.pioneerelectronics.com/PUSA/Computer/Computer+Drives/BDR-211UBK#overview
Configuration:
M/B: Z170 Gaming-ITX/AC
BIOS: P7.10
CPU: 7th generation Intel® Core™ i7/i5 processor for Desktop PC (Kaby Lake-S)
Setup:
1. Please connect the HDMI cable to HDMI2 port of Z170 Gaming-ITX/ac.
2. When the system boots up, press "F2” to enter UEFI setup screen.
Go to Advanced > CPU Configuration and enable "Software Guard Extensions” in BIOS setting.
Press "F10” to save and exit the BIOS setup screen.
6. Due to the fact that HDR is not supported by Intel 100 series chipset, please disable ”UHD color” from TV.
Put a 4K movie BD disc into the Pioneer Ultra HD Blu-ray drive.
7. Click " Power DVD”.
8. Then you can play the content.
Question: How do I install Windows7 on AM4 platform motherboards?(3/1/2017) Answer: Intel® N3000 Series SoC, 100 / 200 Series and AMD AM4 chipset has removed their support for the Enhanced Host Controller Interface, so you might find it difficult to install windows7 operation system Since the USB ports won't work.
Please refer to the Web page from following to install Windows7 on AM4 platform motherboards (in combination with Pinnacle Ridge, Summit Ridge and Bristol Ridge only).
The link is below: https://www.asrock.com/microsite/Win7Install/index.html
Question: I get the BSOD when I install a discrete VGA card driver on Windows 7 or Windows 8 GPT mode with Intel 7 series or AMD FM series chipset motherboards, what should I do?(1/1/2013) Answer: Please remove Virtu MVP from the control panel then install the discrete VGA driver.
After installing the VGA driver, you may re-install Virtu MVP.
Question: After updating the BIOS, my Intel IVY Bridge CPU and Intel 6 series chipset motherboard will get the Blue screen and can't boot into Windows 8 anymore. What should I do?(1/1/2013) Answer: Because of the ME version update, Intel ME changes the boot behavior of Windows 8.
Please use the Windows 8 CD to repair your system.
Question: I want to use TRIM function for RAID. Which system supports TRIM for RAID 0?(11/1/2012) Answer: According to Intel documents, for a system to support Trim for RAID 0 it must meet the following conditions.
1. Please check whether your SSD supports TRIM function.
2. Intel 7-Series Express Chipset-based motherboard.
3. Windows 7 (Windows 8 will support Trim for RAID 0 in the future)
4. RAID 0 volume combined by SSD drives.
5. Intel Rapid Storage Technology software 11.0 version or later.
6. Intel SSD Toolbox 3.1.1 version or later.
Question: When I set SATA as RAID or AHCI mode, I can not view S.M.A.R.T values with some utility like AIAX64 or CrystalDiskInfo, why?(5/1/2012) Answer: Please enter Intel Rapid Storage Technology to check S.M.A.R.T values under RAID or AHCI mode.
Because of S.M.A.R.T. values are reported as S.M.A.R.T. alerts by the Intel Rapid Storage Technology user interface and tray icon.
For detail, please refer Intel official website: http://www.intel.com/support/chipsets/imsm/sb/cs-015002.htm
Question: What are the basic requirements for Intel Smart Response Technology?(5/1/2012) Answer: According the Intel document, for a system to support Intel Smart Response Technology it must have the following:
• Intel® Z68/Z77 Express Chipset-based desktop board
• Intel® Core™ i3/i5/i7 Processor in the LGA 1155 package
• System BIOS with SATA mode set to RAID
• Intel Rapid Storage Technology software 10.5 version release or later
• Single Hard Disk Drive (HDD) or multiple HDD's in a single RAID volume
• Solid State Drive (SSD) with a minimum capacity of 18.6GB
• Operating system: Microsoft Windows Vista 32-bit Edition and 64-bit Edition, Microsoft Windows 7 32-bit and 64-bit Edition.
For more information, please refer to the user guide of Intel Smart Response Technology: http://download.intel.com/support/chipsets/sb/intel_smart_response_technology_user_guide.pdf
Question: How could I enable Dual-link DVI on AMD 880G, 890GX chipset series motherboards?(3/1/2012) Answer: Please set [Onboard HDMI HD Audio] option to [Disabled] in BIOS.
Route: BIOS-> Advanced-> North Bridge Configuration-> Disabled [Onboard HDMI HD Audio] option.
Question: How do I setup digital sound (DTS5.1, Dolby5.1, DTS HD Master and Dolby True HD) output via HDMI or SPDIF?(11/1/2011) Answer: Requirements:
OS: Windows7, Vista SP2 or later.
Receiver / decoder: Onkyo TX-SR608 amplifier for example:
Playback software: for example Power DVD10 v10.0.2025.52 or other playback software.
Setup:
1. Please install all drivers from support CD, after that please check device manager, there should be no any "!" or "?" on list.
2. Please enter Control Panel > Hardware and Sound > Sound,
If you would like to output via HDMI, please select [HDMI output]
If you would like to output via SPDI, please select [Digital output]
*Different motherboard/chipset may show different information, above picture is for references only.
3. Enter the Audio settings in your application.
We take Power DVD 10 here for example: Choose the Speaker environment and Output modes as you want.
4. Set your decoder/amplifier to the digital sound output, which you want.
5. Set the correct output format on your content /source manual.
Step2:
Please unzip the SATA RAID driver which downloaded in Step1 and put the SATA RAID driver in USB flash drive.
Step3:
Please click "Load Driver" when selecting hard drive in Windows installation.
Step4:
Click "Browse"
Step5:
Choose the folder downloaded in Step1.
RSTe_f6_iaStorA_2008R2_32 is used for 32-bit operating system.
RSTe_f6_iaStorA_2008R2_64 is used for 64-bit operating system
Step6:
Select the SATA RAID driver for "Intel(R) C600 Series …." as below picture and click next to install the OS.
Question: I have installed all the drivers from support CD, but I could not enable the Intel Smart Response Technology on my Z68 motherboard. What should I do?(5/1/2011) Answer: First, please download and update BOTH of your BIOS and Intel Rapid Storage Driver.
After doing so, please follow the steps below to setup Intel Smart Response:
Step 1. Before booting up the system, please make sure to connect your HDD to supported SATA ports.
For Z68 Extreme4, please connect to the ports as shown below.
These ports are from Intel PCH chipset, which support Intel Smart Response Technology.
Please note that, for Z68 Pro3 or Z68 Pro3-M, all the SATA ports are supported.
※ Note:
We recommend users to connect your HDD to SATA3 ports if your HDD is SATA3 spec.
Please DO NOT connect SSD to the system at the moment.
Step 2. Please press F2 or DEL to enter BIOS > Advanced > Storage Configuration.
Step 3. Please set SATA mode to [RAID Mode] as shown below
Step 4. In RAID ROM screen, HDD status should be "Non-RAID Disk"
Step 5. Please install OS in SATA HDD, after installation, please shut down your system and connect SSD to SATA ports listed above.
Question: Why can't I play Blu-ray discs with Core100HT-BD under Windows XP?(4/1/2011) Answer: For Intel graphics platforms (including G41, H55, H67 chipsets…etc), Blu-ray playback is only supported on Windows Vista and Windows 7.
Question: Why will the memory size be less than I install on post screen with P55, H55, X58, P67 and H67 series motherboards?(12/30/2010) Answer: This is H55, P55, X58, P67 and H67 chipset normal behavior.
Due to the size is used for Intel® CPU, post screen memory size will less than you install.
Question: I adopt Samsung HD323HJ / HD502HJ / HD503HI / HD103SJ / HD105SI HDD to AMD® SB850 chipset motherboard, but when I start system, the HDD did not spin up. How should I do?(5/6/2010) Answer: Please visit Samsung website to update HDD F/W.
You can also refer Samsung FAQ from below link for detail: http://www.samsung.com/global/business/hdd/faqView.do?b2b_bbs_msg_id=308
Question: If I use AC'97 front audio panel with VIA® audio codec motherboard, how do I connect AC'97 front panel to HD Audio header on the motherboard?(2/10/2010) Answer: If you use AC'97 front audio panel, please install it to the HD audio header as below:
A. Connect Mic_IN (MIC) to MIC2_L.
B. Connect Audio_R (RIN) to OUT2_R and Audio_L (LIN) to OUT2_L.
C. Connect Ground (GND) to Ground (GND).
D. MIC_RET and OUT_RET are for HD audio panel only. You don't need to connect them for AC'97 audio panel.
E. Enter BIOS Setup Utility. Enter Advanced Settings, and then select
Chipset Configuration. Set the Front Panel Control option from [Auto] to [Enabled]. For Windows® XP
F. Enter Windows® system. Click the icon on the lower right hand taskbar to enter VIA® ADeck. Click "Mixer", select "Front Microphones", choose "Front Mic Boost", and leave.
Like below picture:
H. If you want to hear your voice through Front Mic, Please click "Mixer", select "Play Back", choose "Front Mic", and leave.
Like below picture:
For Windows® Vista™ / Windows® 7
F. Enter BIOS "Chipset Settings" page, manual [Front Panel] to [Enable].
G. Enter Windows® system. Click the icon on the lower right hand taskbar to enter VIA® VDeck. Click "Front Mic", select "Default Device"
H. If you want to hear your voice through Front Mic, Please click "Speaker Output" icon.
Like below picture:
Question: Does my motherboard support Windows® 7?(11/21/2009) Answer: Please refer our website for windows7 support list.
Website link: https://www.asrock.com/news/events/2009win7/index.asp
If your models are not listed on Windows® 7 support list, please kindly try inbox driver first.
Or go to chipset vender website to download the chipset driver.
Intel® website: http://downloadcenter.intel.com/Default.aspx
AMD® website: http://support.amd.com/us/gpudownload/Pages/index.aspx
NVIDIA® website: http://www.nvidia.com/Download/index.aspx?lang=en-us
Realtek website: http://www.realtek.com.tw/downloads/
VIA® website: http://www.via.com.tw/en/support/drivers.jsp
If you got any further issues, please contact ASRock TSD : Asrock_TSD@asrock.com.tw
Question: Why my P55 chipset motherboard cannot boot up, the Dr. Debug LED display shows error code "E8".(10/22/2009) Answer: Due to the Chipset spec., please insert the memory module into the white slot (DDR3_B1) which is nearly CPU socket for the first priority.
Please insert your DRAM in this slot for the first priority.
Question: I installed Vista x64 sp1 on ALiveNF6G-GLAN, but I cannot shut down my system after I execute the "sysprep" program under operating system. What do I do?(6/25/2009) Answer: Due to the NVIDIA® chipset specification, the HDD driver is requirement, please install the HDD driver during the installation of operating system.
Please refer to below steps to install the HDD driver:
1. Please download the driver and save the driver to floppy disk, USB driver, CD or DVD.
HDD driver download link : https://www.asrock.com/mb/download.asp?Model=NF6-GLAN&s=AM2
2. Click "Load driver" icon at the "Where do you want to install Windows?" stage.
3. Then click "OK"
4. Check the icon and click "Brows"
5. Then choose the driver from the source which you saved.
6. Select the HDD driver and click "Next" to install the driver.
Question: I am using Intel® chipset X48 / X38 / P45 / P43 / G43 / P35 / G31 / P965 series motherboard with 4GB memory modules installed. But it always detects the memory size as 3GB instead of 4GB at POST screen. What should I do?(10/23/2008) Answer: Please enter BIOS setup and enable the "Memory Remap Feature" option.
(BIOS / Advanced / Chipset Configuration / Memory Remap Feature)
Question: When I install a Terratec Cinergy C PCI TV card or Technisat Cablestar HD2 TV card on VIA® chipset based motherboards, such like 4CoreDual-SATA2 (PT880 series motherboards) or ALiveSATA2-GLAN, it always show "PCI IRQ routing table error" message after BIOS POST, or simply hang up during BIOS POST. Any way to fix the problem?(9/5/2008) Answer: Due to compatibility issue of VIA® chipset with Terratec Cinergy C PCI TV card and Technisat Cablestar HD2 TV card.
We don't recommend using this kind of TV card on VIA® chipset motherboards. Sorry for your inconvenience.
Question: My motherboard is with NVIDIA® Geforce 7050/6150/6100 chipset. I use the VGA driver 175.19 from NVIDA website under Windows® XP SP1. After installing the driver, I get 640X480 4bit color under Windows® XP. But using the driver from your support CD, it has no problem.(7/31/2008) Answer: We recommend using the driver provided by ASRock. We tested it on our products to make sure it has the best compatibility and stability. If you still want to use the VGA drivers from NVIDIA® website, please update to Windows® XP service pack 2. It is able to solve this problem.
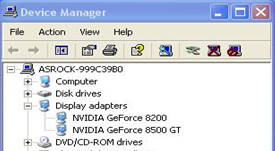
Question: When installing NVIDIA GeForce 8400/8500 series PCIE VGA card on K10N78hSLI-WiFi / K10N78hSLI-1394 / K10N78hSLI-GLAN under Windows® XP/ XP 64-bit, I can not get full system memory. Besides, system shows two display adapters in the Device Manager. What can I do?
(6/26/2008) Answer: While system boot up, please press "F2" to enter BIOS set up screen. Please go into BIOS setup and set "Hybrid SLI" option to [Disabled] in BIOS>Advanced>Chipset Configuration.
Question: My motherboard is ALiveNF6P-VSTA / ALiveNF6G-VSTA (MCP61 chipset). I'm encountering some problems with SATA HDD when installing the drivers of the motherboard under Windows® Vista™. What should I do?(4/28/2008) Answer: Please refer to below suggestions.
If you want to install the Windows® Vista™ with non-RAID mode:
Install the SATA driver v998 from support CD during the installation of Windows® Vista™.
The driver path in support CD is
Support CD/Drivers/ SATA2/ nVIDIA/ Vista64_Vista(112)/ IDE/ WinVista/ sata_ide.
Step1:
Step2:
Step3:
You can also download the SATA driver v998 from ASRock website and save it to a floppy diskette, USB flash drive or CD/DVD disk.
Then install the SATA driver v998 from floppy diskette, USB flash drive or CD/DVD disk during the installation of Windows® Vista™.
If you want to install the Windows® Vista™ with RAID mode:
Please refer to the NVIDIA RAID installation guide.
https://download.asrock.com/Manual/raid/ALiveNF6P-VSTA/English.pdf
Question: How do I get my onboard LAN to work properly?(4/28/2008) Answer: Here are some suggestions:
1.Make sure the "Onboard LAN" option was enabled in BIOS.
2.Make sure the LAN driver was installed properly. Please check it in "Device Manager".
3.Update the BIOS of your motherboard to the latest one.
4.Try the newer LAN driver from ASRock or chipset vendor's website.
ASRock: https://www.asrock.com/support/Download.asp
Realtek: http://www.realtek.com.tw/default.aspx
NVIDIA: http://www.nvidia.com/Download/index.aspx?lang=en-us
VIA
5.Change another LAN cable. (For Gigabit LAN, please make sure your LAN cable could fully work with Gigabit LAN.)
6.Reinstall the operating system.
Question: I use a NVIDIA® 8800GT PCIE VGA card on VIA® chipset motherboard. But I got black screen on the monitor. How do I solve it?(11/5/2007) Answer: The NVIDIA® 8800GT PCIE VGA card is GEN2 mode VGA card. Unfortunately VIA® chipset does not support GEN2 mode VGA card. The only solution is to set 8800GT PCIE VGA card to GEN1 mode.
We have tested 8800GT PCIE VGA card. After flashing GEN1 mode BIOS for 8800GT, it works fine on VIA® chipset motherboard.
Please contact VGA card vender to get the VGA BIOS with GEN1 mode for your 8800GT PCIE VGA card.
Question: ALiveNF7G-HD720P/ALiveNF7G-HDready support HDMI output?(6/25/2007) Answer: Yes, ALiveNF7G-HD720P/ALiveNF7G-HDready supports HDMI output.
However, a DVI to HDMI cable or adapter is required.
DVI to HDMI cable
DVI to HDMI Connector
Besides the DVI to HDMI cable/adapter, please also do the following settings in BIOS SETUP and Windows® Vista™/Vista 64-bit:
1.In BIOS SETUP, go to "Advanced"->"Chipset Configuration", and set the option "Onboard HDMI HD Audio" to [Auto].
2.Under Windows® Vista™/Vista 64-bit, go to "Sound" settings and select the Digital Output Device (SPDIF) as a playback device.
You can find more detail information in user manual page 13:
Question: I have 939Dual-SATA2 / 939Dual-VSTA / 939A8X-M / K8A8X-M / K8Upgrade-1689/K8Combo-Z motherboard. When using Nvidia 7600GS/6600LE/6800GS/7800GS "AGP" card, I am not able to install the VGA card driver. How can I solve this?(11/19/2006) Answer: This problem will occur on some AGP cards which does not use native AGP chip, but use native PCI-E chip with an "PCI-E to AGP Bridge" to become AGP interface.
Please set "AGP P2P Deep Fifo" to [Enable] in the BIOS. (Advanced>Chipset Settings>AGP P2P Deep Fifo)
It may need to upgrade the BIOS for this option:
Question: I'm using the Core 2 Duo E6XXX CPU and DDRII 533/667 RAM on 775Dual-VSTA motherboard. But the system is very unstable. Sometimes it gets blue screen or fail when installing the Windows® XP or some applications. How do I fix this problem?(9/19/2006) Answer: Please refer to following steps to fix this problem.
Please set the "DRAM Frequency" as "[333MHz (DDRII 667)]" in BIOS setup if you use DDRII 667 RAM. (BIOS/ Advanced/ Chipset Configuration/ DRAM Frequency)
Please enable the "Flexibility Option" in BIOS setup if you use DDRII 533 RAM. (BIOS/ Advanced/ Chipset Configuration/ Flexibility Option)
If the problem still remains, please update the BIOS to P1.80 or later version.
https://www.asrock.com/mb/download.asp?Model=775Dual-VSTA#bios
Question: I'm using a SATA HDD. My computer was running fine. But one day I turn on my computer, it keeps restarting itself after Windows® Logo page (at startup). Do you have any idea what possibility causes this?(7/21/2006) Answer: This may be that your system was installed in IDE (or non-RAID) mode. But now it is set to RAID (AHCI) Mode. Please try to set it back to the IDE (non-RAID) mode in the BIOS>Advanced>IDE Configuration.
Here are some examples, please refer to the user manual for details.
Question: I have installed total 4GB memory on my motherboard. However, it can only recognize around 3GB or less. How should I do to recognize 4GB totally?(2/17/2006) Answer: Please refer the description Q4 of Q&A-20.
https://www.asrock.com/support/QA/TSDQA-20.pdf
This limitation applies to most chipsets & Windows® XP 32-bit version operating system.
If you want to get 4GB memory for your system, below two conditions must be required:
1. The memory controller which supports memory hole(memory remap) functionality is used. The latest chipsets like Intel® new chipset, or other chipsets and AMD® K8 CPU architecture can support the memory hole(memory remap) function.
2. Windows® XP Pro X64 Ed. (64-bit) or other OS which can address more than 4GB memory.
http://www.intel.com/support/motherboards/server/sb/cs-016594.htm
Question: If I use AC'97 front audio panel with, how do I connect to the High Definition Audio header on the motherboard and get front audio work?(2/17/2006) Answer: If you use AC'97 audio panel, please install it to the front panel audio header as below:
A. Connect Mic_IN (MIC) to MIC2_L.
B. Connect Audio_R (RIN) to OUT2_R and Audio_L (LIN) to OUT2_L.
C. Connect Ground (GND) to Ground (GND).
D. MIC_RET and OUT_RET are for HD audio panel only. You don't need to connect them for AC'97 audio panel.
E. Enter BIOS Setup Utility. Enter Advanced Settings, and then select Chipset Configuration. Set the Front Panel Control option from [Auto] to [Enabled]. For Windows® XP
F. Enter Windows® system. Click the icon on the lower right hand taskbar to enter Realtek HD Audio Manager. Click "Audio I/O", select "Connector Settings", choose "Disable front panel jack detection", and save the change by clicking "OK".
For Windows® Vista™
F. Enter Windows® system, 1: Double click the icon on the lower right hand taskbar to enter Realtek HD Audio Manager. 2: Click the "Folder" icon at the top-right corner. 3. Check "Disable front panel jack detection". 4. Click "OK".
(Please refer to the following picture)
G. To activate the front mic: For Windows® XP:
Please select the Front Mic as default record device in No. 1.
If you want to hear your voice through Front Mic, please deselect "Mute" in No. 2 For Windows® Vista™:
1.Go to the "FrontMic" Tab in the Realtek Control panel.
Click "Set Default Device" to make the Front Mic as the default record device.
Question: I installed Windows XP x64 Edition on a system which is built by an Intel EM64T CPU and 4 GB memory on 775i915P-SATA2 / 775i65PE / 775V88+ / 775V88. Windows reports system memory about 3.0 - 3.5 GB. Why?(12/19/2005) Answer: Although the CPU and Operating system supports 64 bit addressing, Intel 915P, 865PE and VIA PT880 chipsets does not support remapping function. The missing memory addresses are reserved for PCI I/O space, AGP aperture mapping space, and other onboard device I/O space. Although the chipset datasheet may claim memory support up to 4 GB, the system actually only reports about 3.0 - 3.5 GB with four 1 GB DDR memory modules.
Question: I have a P4i65PE motherboard. The SPEC of P4i65PE supports "Bypass Access Technology (BAT)" on ASRock website. How do I get this function to work?(6/23/2005) Answer: If you want to use Bypass Access Technology, the configuration of your system has to conform to the following conditions:
1.FSB 800 CPU
2.DDR 400 memory
3.BIOS version P1.10 or higher
Please refer to our website to download the BIOS.
https://www.asrock.com/mb/download.asp?Model=P4i65PE
If your configuration conforms to these conditions, please enter BIOS setup => Advanced => Chipset Configuration to enable "Bypass Access".
Question: According to the specification of P4Dual-915GL/775Dual-915GL on ASRock website, it can support up to 224MB VGA shared memory. Where can I adjust the VGA shared memory size?(4/8/2005) Answer: Intel 915GL chipset supports Dynamic Video Memory Technology (DVMT). DVMT will dynamically allocate VGA memory based on system needs and is not user configurable.
For further information, please refer to Intel website:
http://www.intel.com/support/graphics/intel915g/sb/CS-011817.htm?iid=graphics+915main&
Question: My motherboard is Intel 915GL chipset based. After I installed Intel VGA driver 14.10, the screen became black when entering into Windows 2000/XP. What should I do?(4/8/2005) Answer: Intel newer VGA driver 14.11 may solve this problem.
When booting up, please press F8 to enter OS with safe mode and uninstall VGA driver 14.10.
Please refer to Intel website to download VGA driver 14.11 and install it.
http://downloadfinder.intel.com/scripts-df/Detail_Desc.asp?agr=N&ProductID=1765&DwnldID=8543
Question: If I use only one 128MB memory on the ASRock board with integrated VGA (ex. K7VM3, K7S41/GX, etc...), what share memory size should I choose?(1/18/2005) Answer: Since the share memory uses the system memory, for better system performance, we recommend you to set share memory size to 32MB or less in the BIOS setting. (For Intel chipset based motherboards, please refer to TSD-QA-08 (June, 13th, 2003) https://www.asrock.com/support/QA/TSDQA-08.pdf)
Question: My motherboard is K7S41(GX), what should I set in the BIOS setup to use the on-board VGA with a PCI VGA card for dual monitors function?(10/15/2004) Answer: To use on-board VGA with a PCI VGA card for dual monitors function, please enter the "Advanced" -> "Chipset Configuration" -> "Onboard Share memory" and adjust "Auto" to any other values (32MB, 64 MB, or 128 MB) in the BIOS setup.
Question: My motherboard is SiS chipset based motherboard and the driver of AGP PCI to PCI is version 1.16a or 1.13.03 installed. After updating the Windows XP to service pack 2, there is an exclamation mark in AGP driver of device manager. What should I do?(8/16/2004) Answer: If you see an exclamation mark in AGP driver of device manager, please simply reinstall the SiS AGP PCI to PCI driver from ASRock support CD or web site again.
Question: My motherboard is K7S8X. I can't format my Samsung hard drive and install OS. What should I do?(8/16/2004) Answer: Please try to update latest BIOS for K7S8X first and then go to BIOS SETUP -> Advanced -> Chipset Configuration -> IDE Driving. Please try to adjust the option.
Question: Why is my 4GB of memory reported as about 3.5GB by the system if the chipset of the motherboard support to 4GB Memory size?(6/11/2004) Answer: Under the current PC memory addressing, there is a memory area just below 4.0 GB which is reserved permanently. The maximum DDR memory support is actually about 3.5GB rather than 4GB. This limitation is caused by the current PC architecture in which the missing 0.5GB of memory addresses are reserved for PCI I/O space, AGP aperture mapping space, and other onboard device I/O space. Thus although the chipset datasheet may claim memory support for up to 4GB, the system actually only offers about 3.5GB with four 1GB DDR DIMMs installed. 32 bit processors only support 4GB of address space.
Question: I have an Intel ICH5 chipset based motherboard. I found that my SATA hard drive is not recognized under Linux. What should I do?(6/11/2004) Answer: Serial ATA (SATA) is a relatively new technology that was not previously available in Linux. To solve this problem, the Kernel of your Linux operating system needs to be updated. Please kindly refer to the following link for solution which is provided by Intel. http://www.intel.com/support/chipsets/sb/CS-006312.htm
Question: When I try to install Intel IAA driver for my P4i65GV or P4i48, it stops and shows the error message "Incompatible hardware. The install package is only compatible with Intel 800-series or compatible chipsets. Install will now exit." Why?(4/15/2004) Answer: P4i65GV and P4i48 are ICH5 south bridge based motherboards. Intel IAA driver does not support ICH5. The Intel IAA driver in our support CD is for ICH4 based motherboard only.
Question: I'm using Intel chipset based motherboard. After installing Win98SE and all drivers, the data transfer rate from IDE devices (HDD or CDROM) seems not fast enough. Is there any thing I can do?(11/14/2003) Answer: When installing Win98SE on Intel chipset based motherboard, please remember to enable the DMA mode to increase the IDE performance. To enable DMA mode in Win98SE, please go to "System"---"Device Manager"----"Disk Drives"----"Generic IDE Disk Type47" and manually check the "DMA" box in "Generic IDE Disk Type47".
Question: In the beginning of P4VT8 SATA driver diskette creating process, my USB keyboard seems doesn't work. What should I do?(11/14/2003) Answer: In order to fix this problem, please go to BIOS SETUP -> Advanced menu -> Chipset Configuration -> USB Device Legacy Support and set it to "Enable". For best system stability, please set it back to "Disable" after the SATA driver diskette creating process.
Question: My motherboard is SiS chipset based K7S8XE, why my USB 2.0 hard disk box can not be recognized under Windows XP?(11/14/2003) Answer: We have experienced that some USB 2.0 boxes may not conscientiously follow the USB 2.0 specification to design, so it cannot operate properly with USB 2.0 specification. Please update the newest BIOS, and then disable the USB 2.0 controller in the BIOS SETUP. At this moment, the USB 2.0 box may have chance to operate with USB 1.1 specification.
Question: I'm using ALi chipset based motherboard, P4AL-8X and P4AL-800. How can I install Linux correctly on them?(10/15/2003) Answer: When installing Linux which the Kernel version is order than 2.4.21 on P4AL-8X or P4AL-800, please follow the bellow procedure.
When installing Linux, at the page choosing the installation between "Graphic mode" or "Text mode", please type "boot: linux pci=conf2" to complete the installation.
After the installation, in the GRUB boot up menu, please press "a" to modify the kernel argument. Please type "ro root=LABEL=/ pci=conf2" in order to boot up correctly.
Download the latest Kernel from http://www.kernel.org/pub/linux/kernel/ , for example, linux-2.4.22.tar.gz from another system.
Copy the latest Kernel into this Linux system.
Compile the latest Kernel.
For further Linux information about ALi chipset, please visit
http://www.ali.com.tw/
Question: The north bridge of my VIA chipset based motherboard M266A is hot, is it normal?(8/15/2003) Answer: Yes, it is normal, because the VIA P4M266A chipset is made by older process which may generate more heat.
Question: I have SiS chipset based motherboard (ex. GE Pro-HT) and ATI ALL-IN-WONDER 9000 Pro AGP card. How can I capture the video correctly?(8/15/2003) Answer: If you want to use the capture function of ATI ALL-IN-WONDER 9000 Pro AGP card on GE Pro-HT, please remove the SiS mini IDE driver and try again.
Question: Can I install 4 DIMM of DDR SDRAM with P4 FSB 533 MHz CPU on P4VX4 motherboard?(7/9/2003) Answer: If you are using P4 FSB 533 MHz CPU on P4VX4, please install 3 or less than 3 DIMM of DDR SDRAM. When you install 4 DIMM of DDR SDRAM, they would run at DDR 200(PC1600) speed. According VIA chipset SEPC, FSB 533 MHz CPU must run with DDR 266 or higher speed memory. So if you install 4 DIMM of DDR SDRAM, please run with FSB 400 MHz CPU.
Question: Does Intel 845 series (P4i45D / P4i45E / P4i45GL / P4i45GV / P4i45PE / P4i45G / 775i45GV) chipset support 3.3V AGP card?(10/29/2002) Answer: Intel 845 chipset supports 1.5V signaling AGP cards only and the AGP slot on motherboard got 1.5V key in it following the AGP specification in order to prevent a 3.3V AGP card from being plugged in. However, it turned out some AGP adapters operate at only 3.3V signaling level, were notched at the 1.5V key on the golden-finger interface.
When using these cards, if the Vddq and VCC3.3 signals are shorted on them, will break up the north bridge as the Vddq is raised from 1.5V to 3.3V instead. In other words, the motherboard will be permanently damaged as a result as soon as the system is powered up with such an AGP card. According to AGP specification, AGP4X mode will work at 1.5V signaling level only. If your AGP card has the 1.5V notch as
illustrated in the user's manual but it cannot support AGP4X, please check with your card provider or manufacturer whether it can operate at 1.5V signaling level.