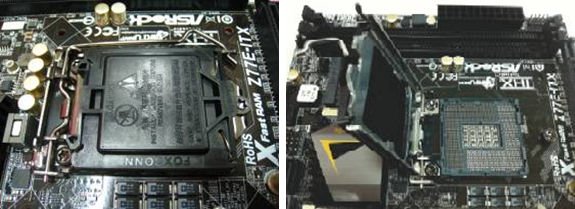
A:There are two different type of CPU protection cover, please check your CPU protection cover type first then follow below SOP to install CPU.
Type A: CPU protection cover on the top of CPU socket.
Step 1. Open the CPU socket without remove CPU protection cover: Disengage the lever by pressing it down and sliding it out of the hook. At this time, you do not have to remove the protection cover.
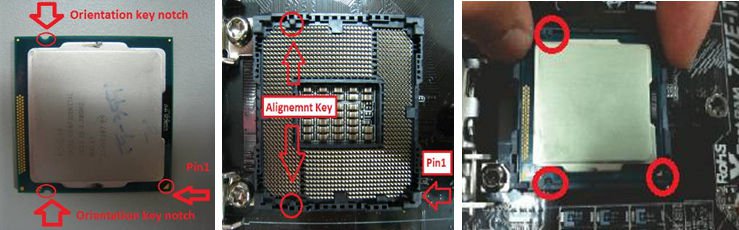
 Step 2. Insert the 115x-Pin CPU:
 Make sure locate Pin1 and the two orientation key notches, then carefully place CPU into the socket.
 Step 3. Close the socket:
 Press down the load lever, and secure it with the load plate tab under the retention tab. The protection cover will automatically come off by itself.
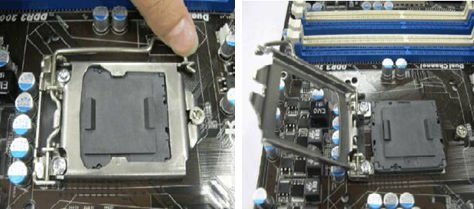
 Type B: CPU protection cover in CPU socket.
Step 1. Open the CPU socket:
Type B: CPU protection cover in CPU socket.
Step 1. Open the CPU socket: Disengage the lever by pressing it down and sliding it out of the hook.
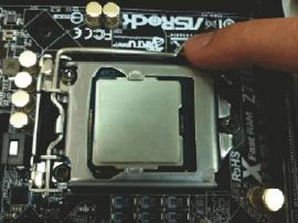
 Step 2. Remove CPU protection cover:
 Attach your index finger to the upper edge of the PnP Cap. Use your thumb to remove PnP Cap (Pick and Place Cap) from the CPU socket by lifting the cap tab.
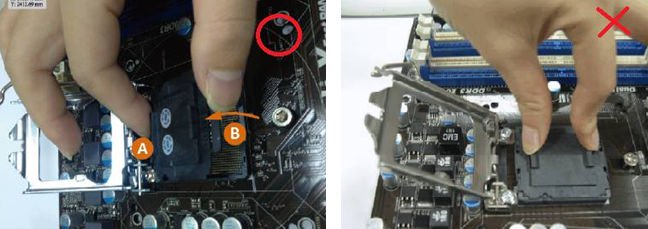
NEVER remove PnP Cap as pictured on the above. Incorrect removal of the PnP cap may cause damage to the CPU socket contacts.
Step 3. Insert the 115x-Pin CPU: Make sure locate Pin1 and the two orientation key notches, then carefully place CPU into the socket.
 Step 4. Close the socket:
 Press down the load lever, and secure it with the load plate tab under the retention tab.

 Thực đơn