We use cookies to offer you a more personalized and smoother experience. By visiting this website, you agree to our use of cookies. If you prefer not to accept cookies or require more information, please visit our Privacy Policy.
Necessary cookies These cookies are essential for the proper functioning of the website and cannot be turned off.
Analytics cookies These cookies help us understand how visitors use our website.
Marketing cookies These cookies are used to track visitors and display relevant advertisements.
Social media cookies These cookies allow you to share pages and content on social media.
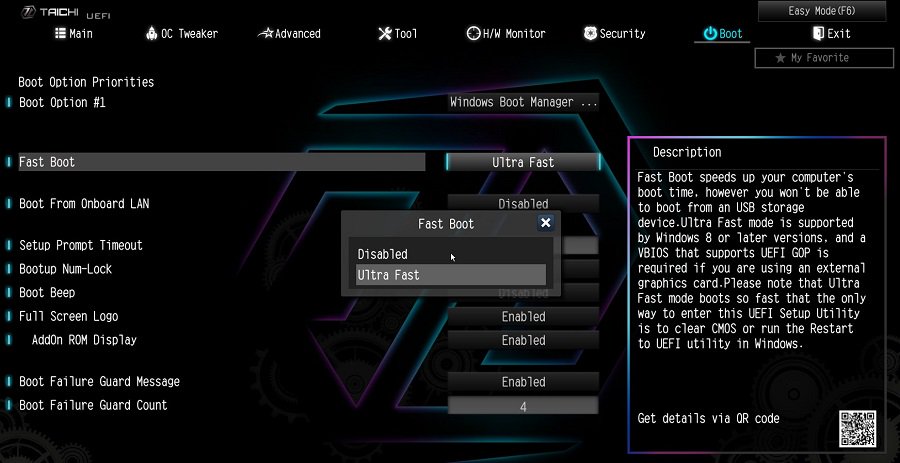
Question: Why can I not find a CSM option under the Boot tab in BIOS?(10/13/2022) Answer: When you set Fast Boot to Ultra Fast under the boot tab in BIOS, CSM (Compatibility Support Module) will be disabled and hidden automatically. This is because Ultra Fast Boot is supported only when booting in full UEFI mode, so without enabling CSM.
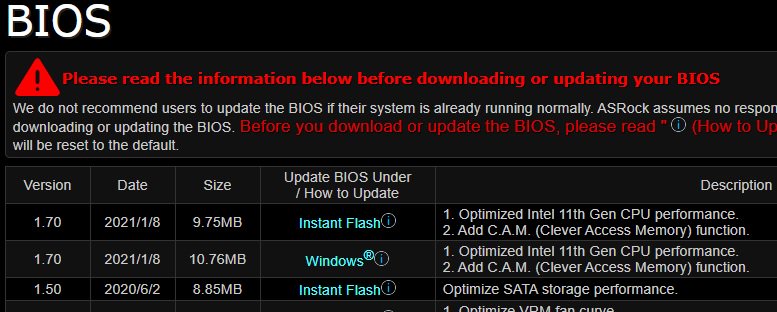
Question: How to enable C.A.M in the BIOS? Also known as Resizable BAR.(4/1/2021) Answer: Step 1: On the ASRock website please find the BIOS download page for you motherboard.
Check the descriptions to see if C.A.M. is supported already.
Intel 500-series models support C.A.M. since the first version.
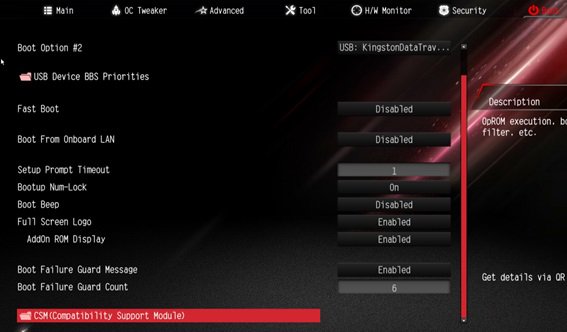
Step 2: While the system is starting press "DEL” to boot into BIOS setup and go to BIOS\Boot\CSM.
If you cannot find the CSM menu then please set "Fast Boot” to "Disabled”.
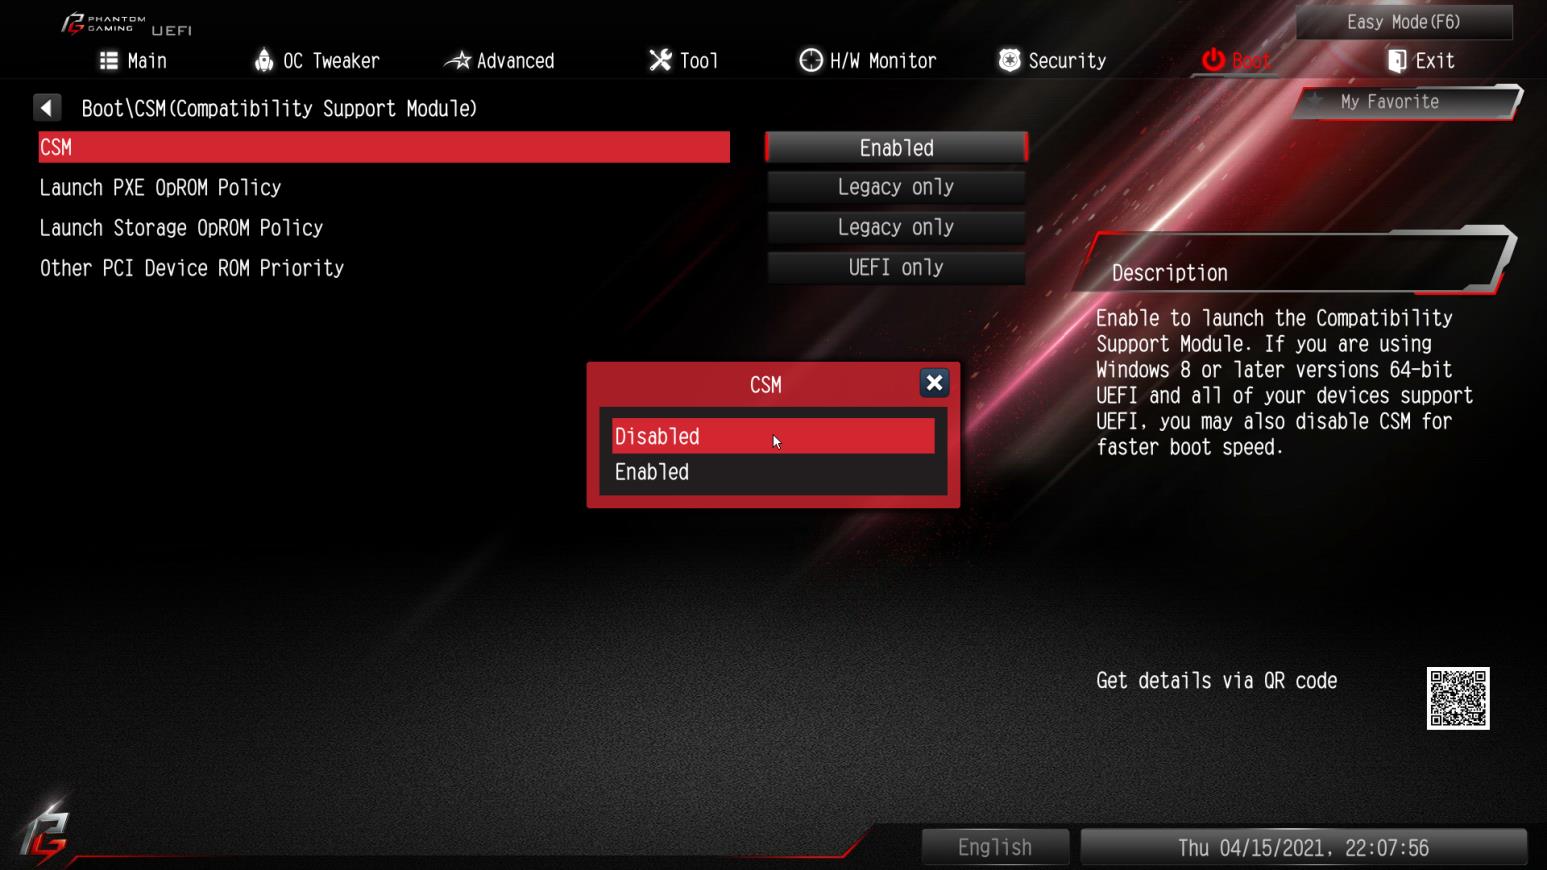
Step 3: In BIOS\Boot\CSM please set "CSM” to "Disabled”.
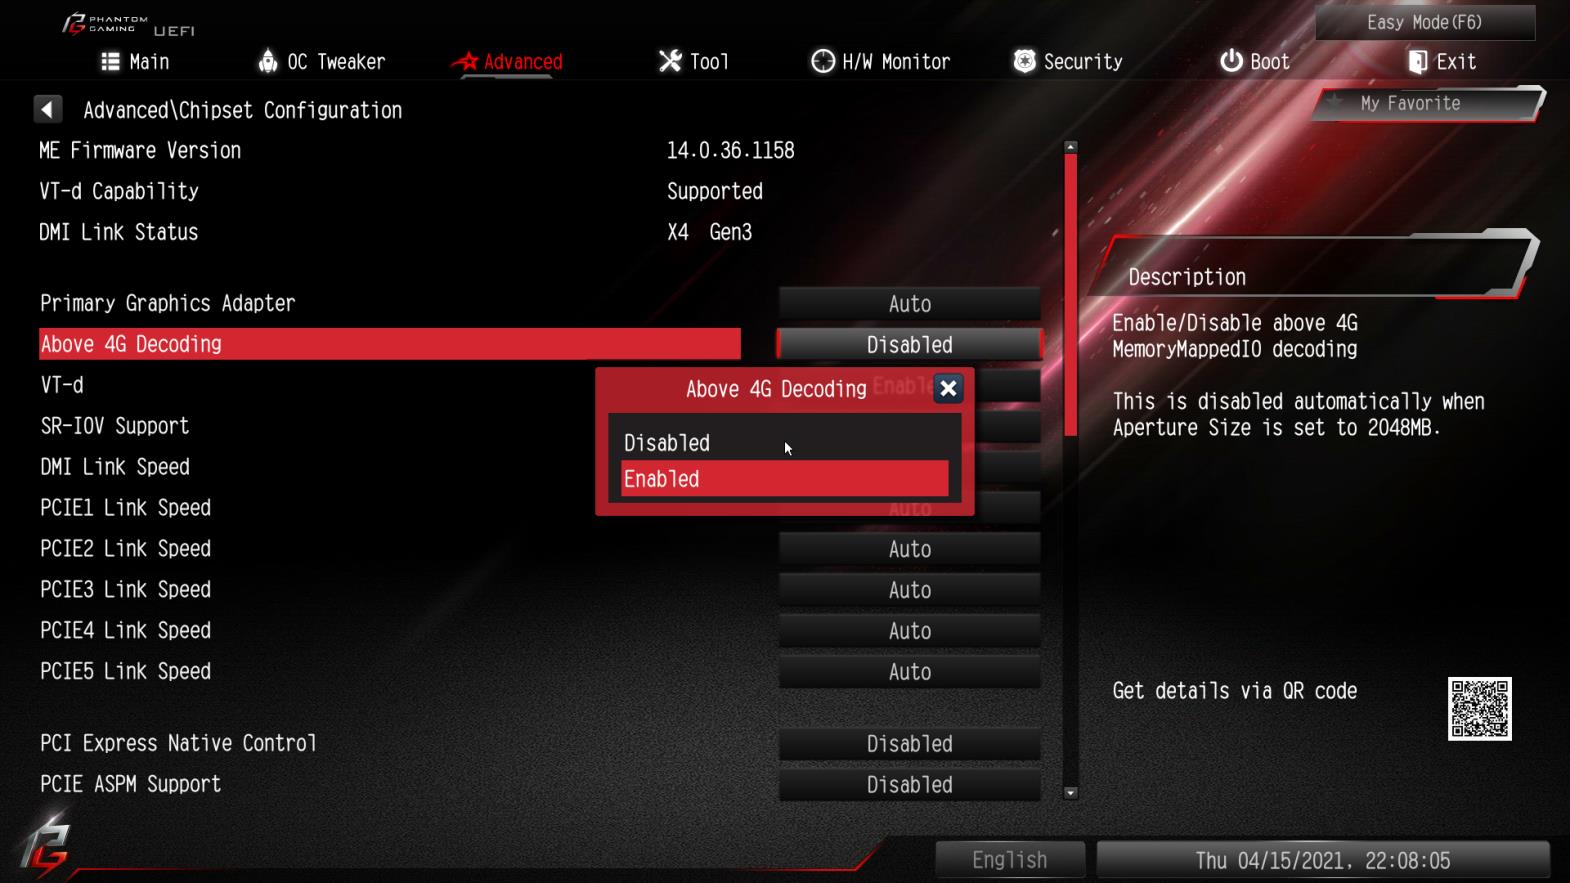
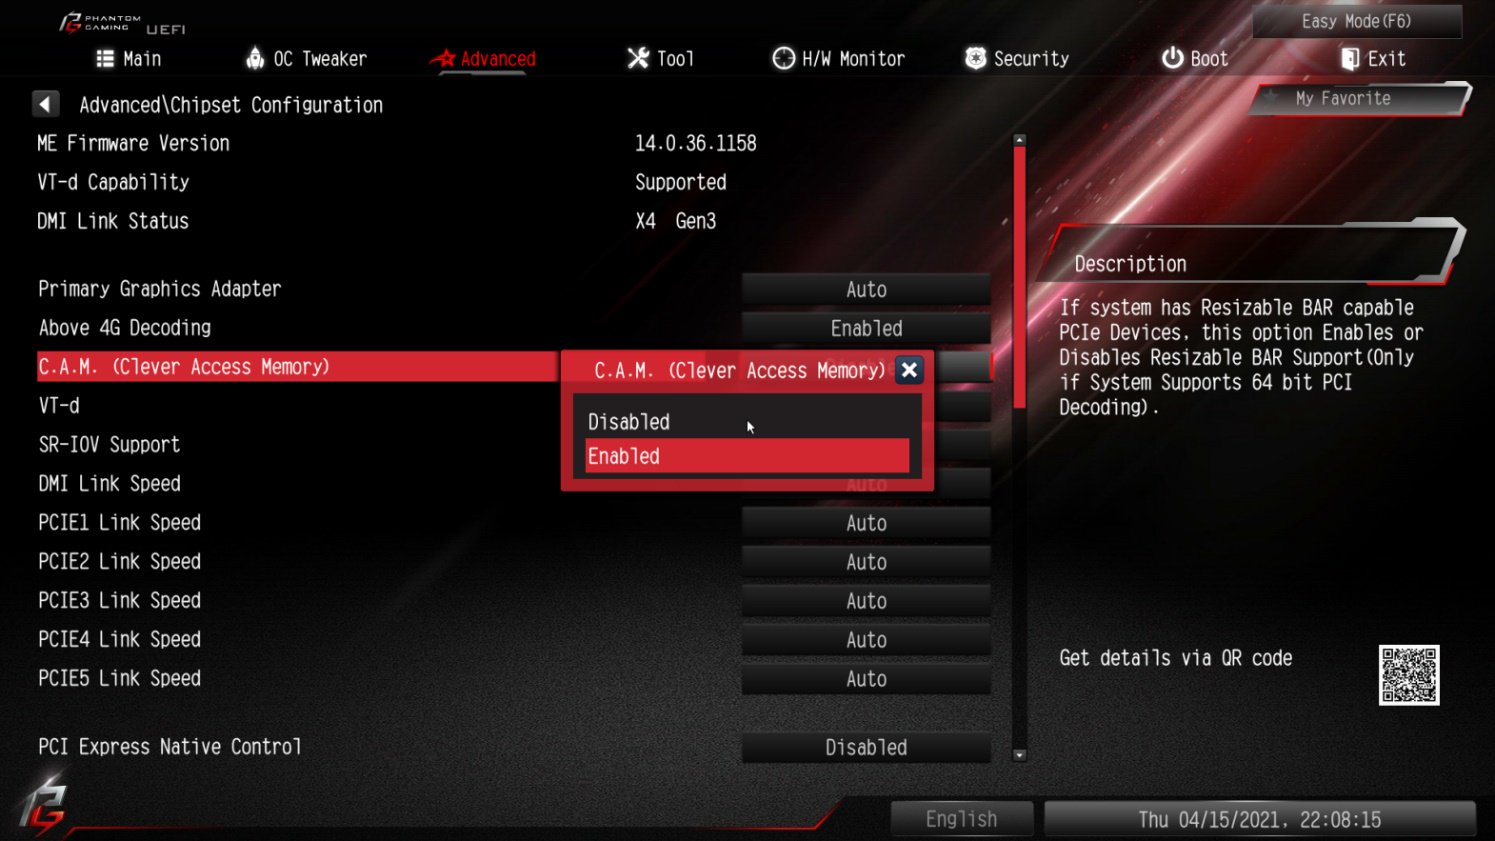
Step 4: Go to BIOS\Advanced\Chipset Configuration and set "Above 4G Decoding” to "Enabled”.
Step 5: After step 4, the option "C.A.M” will appear below the option "Above 4G Decoding”.
Please set it to "Enabled”.
Step 6: Press "F10” to save the settings and restart the system.
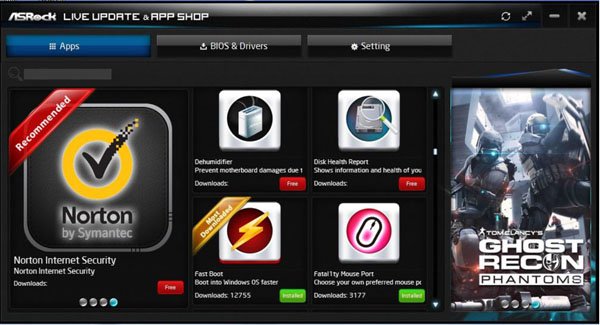
Question: How do I obtain ASRock software i.e. XFast RAM, Fast Boot, Good Night LED, Dehumidifier, Key Master, USB Key, OC DNA on Z170/ H170/ B150 Gaming series M/B?(8/1/2015) Answer: For Intel 100 series gaming models, these features are supported by ASRock APP Shop.
If you'd like to use these tools, please download them from ASRock Live Update APP Shop.
Below is a snapshot of the current ASRock APP Shop.
Question: Will dual operating systems work with Fast Boot?(2/1/2013) Answer: Yes, it will work. But because Fast Boot mode only initializes one disk drive/RAID volume, please make sure the operating systems are installed in the same HDD/RAID volume.
Question: Does my ASRock 6-series motherboards support Intel Ivy Bridge CPU?(2/1/2012) Answer: For support Intel next generation 22nm CPU, it required correspond BIOS version, drivers, and AXTU update.
Please follow below steps to update correspond BIOS, drivers and Utilities.
Step 1: Check BIOS version.
Please check below table and update BIOS since or higher version.
If you have the same or a higher BIOS version on your motherboard, there is no need to update the BIOS and you can skip step 2.
Model
BIOS Version
H61M-VS R2.0
P2.10
H61M-HGS
P1.50
H61M-HVS
P1.90
H61M-HVGS
P1.70
H61M/U3S3
P1.70
H61M-ITX
P1.60
H61iCafe
P1.70
H61DE/S3
P1.70
H61DE/SI
P1.70
H61M-PS
P1.40
H61M
P1.70
H61DEL
P1.70
H61M-GE
P1.70
P65iCafe
P1.40
H61M-VS
P2.10
H61M-S
P1.50
H61M-GS
P1.50
Model
BIOS Version
Fatal1ty Z68 Professional Gen3
P2.10
Z68 Extreme3 Gen3
P2.10
Z68 Extreme4 Gen3
P2.10
Z68 Extreme7 Gen3
P2.10
Z68 Pro3
P2.10
Z68 Pro3 Gen3
P2.10
Z68 Pro3-M
P2.10
Z68M/USB3
P2.10
Z68M-ITX/HT
P2.20
Z68 Extreme4
P2.20
Model
BIOS Version
Fatal1ty P67 Performance
P2.10
Fatal1ty P67 Professional
P3.10
P67 Extreme4
P3.10
P67 Extreme4 Gen3
P2.10
P67 Extreme6
P2.10
P67 Pro
P2.10
P67 Pro3
P3.10
P67 Pro3 SE
P2.10
Model
BIOS Version
H67DE3
P2.10
H67M
P2.10
H67M-GE
P2.10
H67M-GE/HT
P2.10
H67M-ITX
P2.10
H67M-ITX/HT
P2.10
There are two ways to check BIOS version.
1. Boot up your system and press [F2] or [Delete] when ASRock boot logo showing up, you can find the BIOS or UEFI version in the main screen as below.
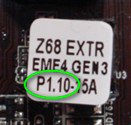
2. Or find the sticker on BIOS ROM chip as below, you can check which BIOS version implemented when motherboard produced.
Step 2: Updating the BIOS
A), If you have a Sandy Bridge CPU or if you can borrow one from a friend then you can easily update the BIOS yourself.
Please download BIOS from above table, and update BIOS.
For further instructions please click on the "How to update" icon in the corresponding row.
B), If you do not have a Sandy Bridge CPU and you cannot borrow it, please contact the dealer where you bought from to update the BIOS for you.
That is the second fastest option to get your board to support the Ivy Bridge CPU.
If that is not possible then please contact ASRock Technical Support for further help.
*Note: If you use a USB flash drive to update BIOS, after new BIOS image has been written to the chip, please press any key to restart system. At this moment, please do not remove the USB flash drive. Intel ME firmware update procedure will proceed automatically if it is required.
**Note: Please only use the BIOS image offered on ASRock website.
Step 3: Update suitable Intel HD graphics driver from ASRock website
*How to update Intel HD graphics driver:
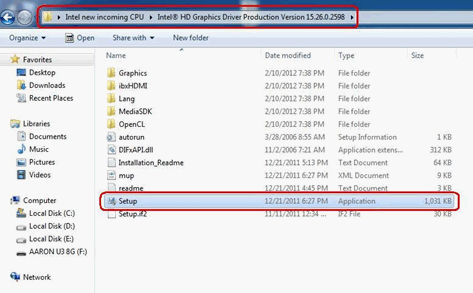
1. Please unzip and open the folder to execute "setup".
2. Follow Intel driver installer to install the graphics driver.
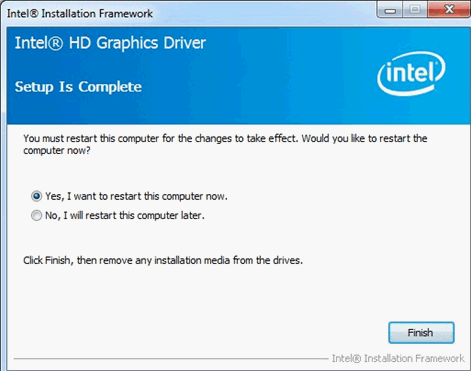
3. After the installation has finished you will see below message, please restart your system at this moment.
Step4: Install the correct version of Intel Management Engine from ASRock website:
*How to update Intel Management Engine:
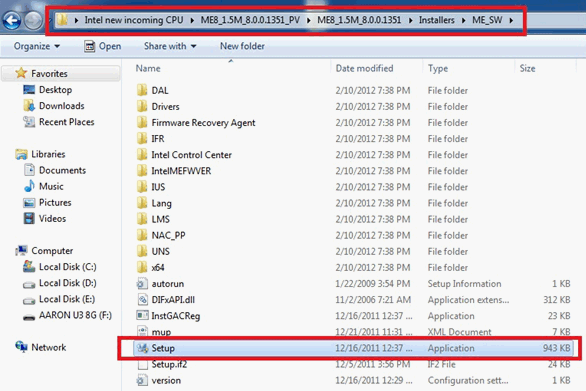
1. Please unzip and open the folder to execute "setup".
Route: Enter Intel ME8 folder-> ME8_1.5M_8.0.0.1351-> Installers-> ME_SW-> Choose "Setup".
2. Follow Intel driver installer to install the ME driver.
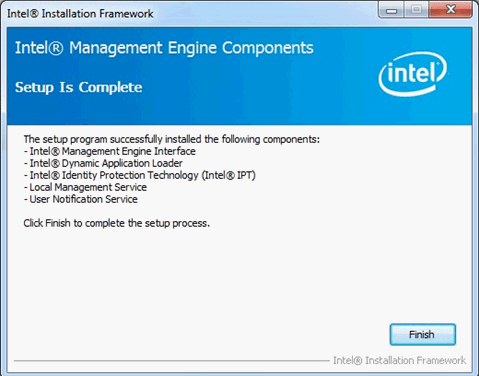
3. After the installation has finished, you will see below message. Please click on "Finish".
Step 5: Install Intel Smart Connect driver for Microsoft Windows7/7 64 bit. OS.
Step 6: Update ASRock AXTU Utility.
Please update new AXTU version on ASRock website.