ASRock
 メニュー メニュー
よりパーソナライズされたスムーズな体験を提供するためにクッキーを使用しています。当ウェブサイトを利用することで、クッキーの使用に同意したものとみなされます。クッキーを受け入れない場合、または、詳細情報をご覧になりたい場合は、弊社のプライバシーポリシーを参照してください。
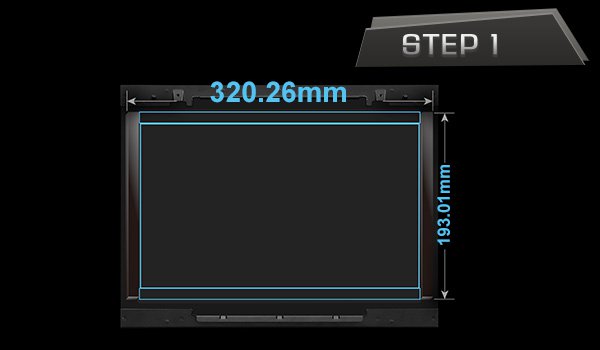
.png)
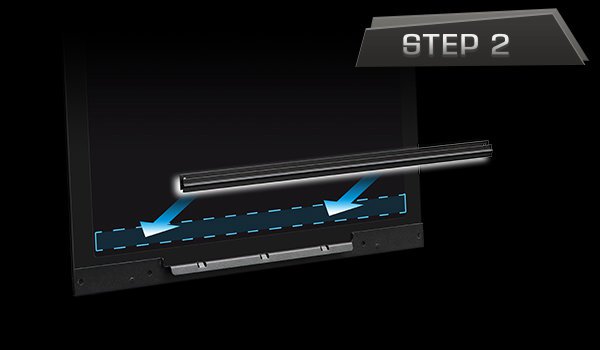
.png)
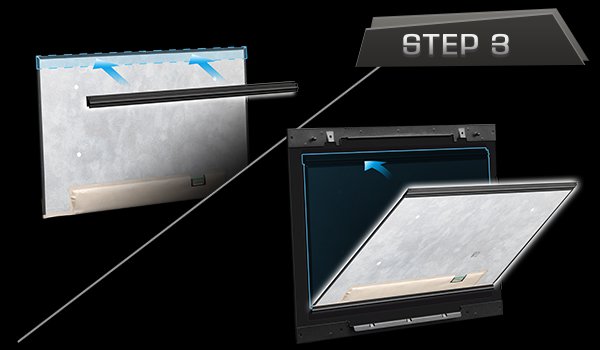
.png)
.png)


規格は予告なしに変更される場合があります。ブランドと製品名の所有権はそれぞれ各社に帰属します。製品の構成が実際の規格と異なる場合があります。
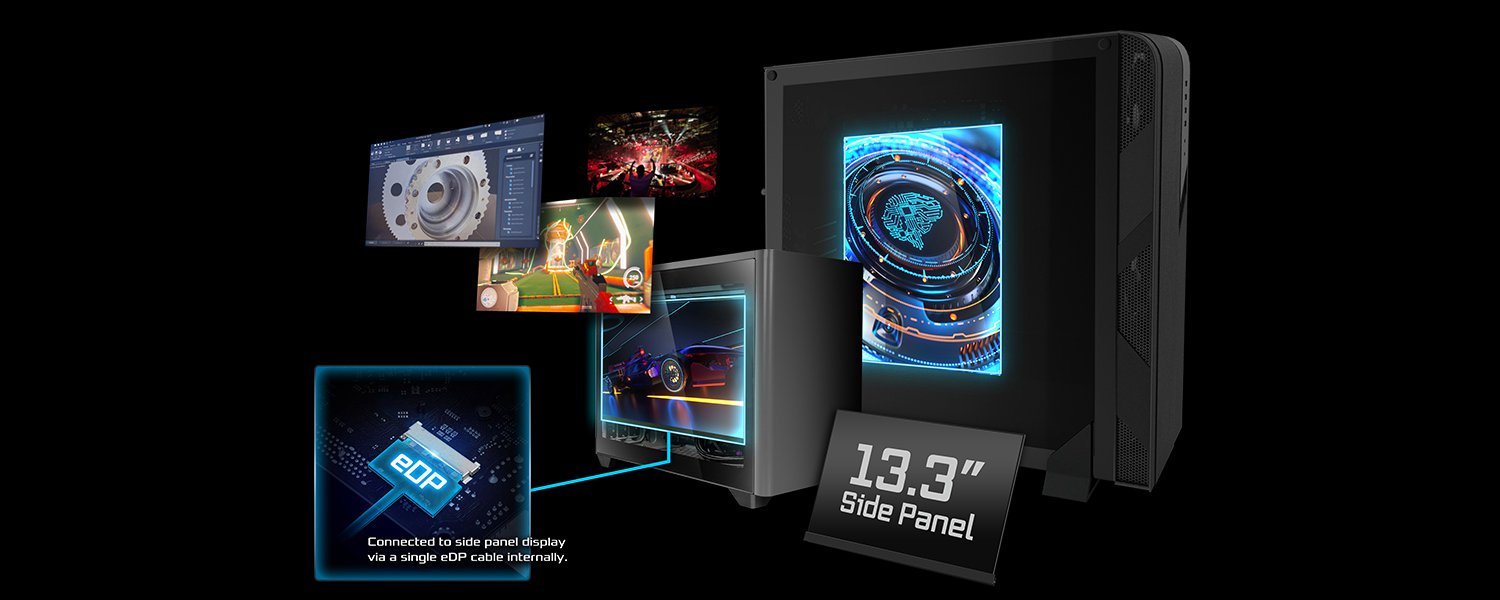
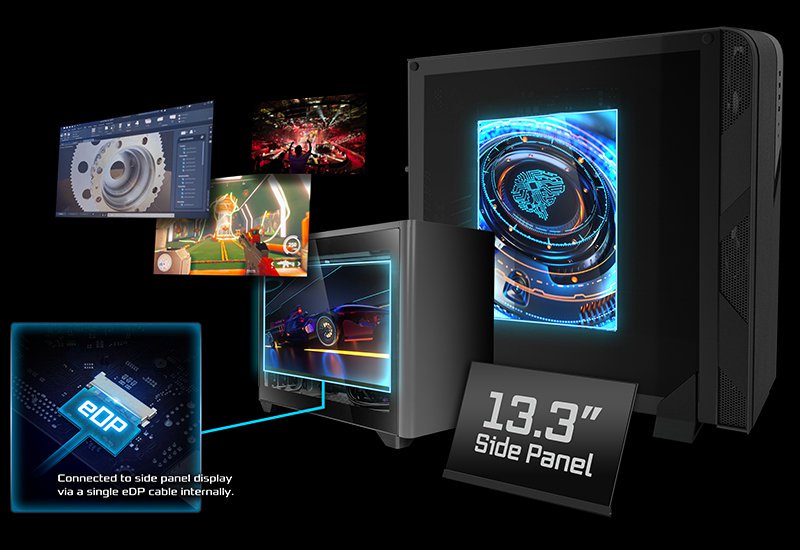
上のユーザーインターフェースの写真は参照用のサンプルです。実際のユーザーインターフェースは、ソフトウェアバージョンの更新により異なる可能性があります。